Monday, 10 October 2016

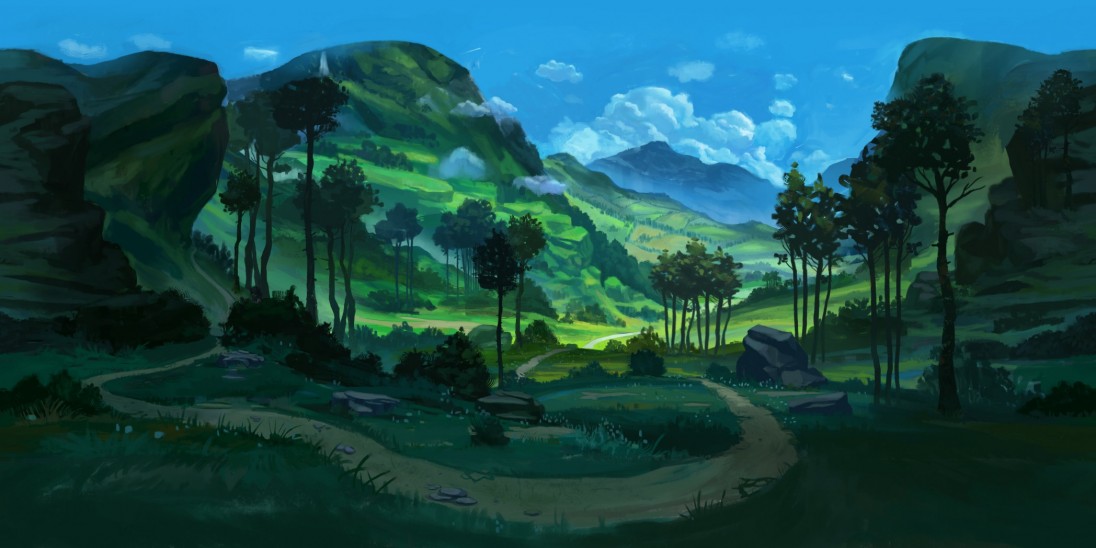
360° Panoramic Painting

http://www.yogjoshi.com/360-panoramic-painting/

Notes:

  • Everything painted in Photoshop, as a flat image.
  • Panopainter, program used to create 360 image, works with PSD files. Each time Photoshop file saves it will update in Panopainter, means you can keep workflow open in 3D to constantly check image is working.
Artist Example (Flat image, painted n Photoshop):

mountainscape 360_6


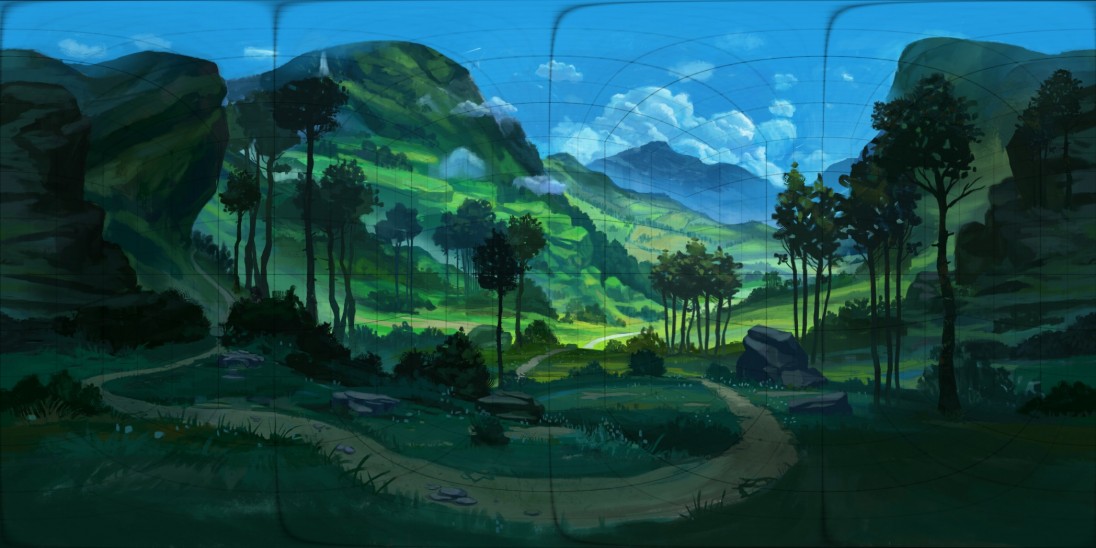
Artist Example (Using a grid, found on Panopainter, as guide):

mountainscape 360_6_grid


Grid used (below) set layer to multiply:
grid

Notes (Cont.):
  • To make left and right edges mesh together use offset (filter>other>offset)
  • "For the horizontal value, enter half the size of the width. In this case the width of my painting was 4096 pixels, so half the value would be 2048."
  • Offset has to be applied individually to all layers
Share:

Monday, 3 October 2016

Google Cardboard (VR) Notes

Notes from playing with games on Google Cardboard App.

  • Motion Sickness!! (made worse by games you have to move around a lot for - with no central point of focus) (Some headsets have it so you can see the sides of the helmet youre wearing, helps with motion sickness.)
  • Add audio/headphones for immersivity
  • Make sure "line" on phone screen matches up with line in cardboard VR
  • 360 degrees TOO IMMERSIVE (Especially for horror games) Scary.
  • Really nice for viewing more arty style games/landscapes/not as bad for feeling sick.
  • Good for viewing art for VR games (better idea of how it could look in 3D)
  • No apps for uploading art, some for panoramic camera photo viewing. 
  • Cardboard Camera: This app allows you to capture a 360 photo, which is basically a panoramic photo that goes all the way around. (Could take panoramic photo of a printed out painting? See if that works.)
  • Cardboard photos are linear, so no looking up or down.
  • PSViewer is a good Cardboard VR app for viewing photospheres, a photosphere is a collection of stitched images that creates a 360 image, like you're looking at the inside of a photographic ball. 
  • Need a phone that fits the gen of google cardboard that you're using.
  • Google Cardboard also favours phones with higher pixel density, higher resolution doesn't make much difference. (Samsung galaxy s6 will work better than an iPhone 6)
  • Your phone needs gyroscope to be able to use the app
  • Need to be running android 4.1 or up
  • Minimal external navigation options, such as controllers, compared to higher end VR
  • Many apps utilise "hover navigation"
  • More expensive/later versions of cardboard VR feature a button on the "VR machine"
  • Android phones have a wider variety of apps for use with Cardboard VR

Google Cardboard test - putting my own work into google Cardboard

There aren't any apps on google cardboard that allow you to put drawings into Google Cardboard in order to turn them into VR. There is an app on Google Cardboard, however, called Google camera which allows you to turn photos into VR. I hoped to use this app to photograph my drawings and turn them into a VR image that could be used using teh google cardboard app and viewer. 

Using the google camera app on google cardboard I did the first test: taking a photo of my own surroundings.

Test 1:

Photo I took using Google Camera is downloadable and viewable through the google camera app through this link: https://vr.google.com/vrphoto/AIJsmdkIYPjHUBtFtkQCTnPL7YTvTSv1kdd09Qk-cekRQ-6SgXaruSIxOH4E

This worked really well. You have to move the camera REALLy slowly when you take the photo though so it took ages to get right. It's actually really effective, it's weird looking at my room in the VR camera because things are in a different place to where they are in real life, it's taken the photo so everythings sun a bit to the right - so when you take the headset off its very bizarre. The only issue is with this app is because it takes a panoramic shot you can't look up or down. 

Test 2: 

Going from taking a panoramic photo, I wanted to see if I could take a panoriamic photo of my own work to view in VR.

Photo I took downloadable/viewable through google cardboard camera app -  link here: https://vr.google.com/vrphoto/AIJsmdmBgWDrUxIcrPlkf8zOPkXoW4h6yjT7aa2Cjg2zPpNU0J-DXgBTq23T

This didn't work very well. I was hoping to just go really slow moving the camera over the drawing and then finishing the panoramic shot early but this only gives a very small shot of an image and the rest of the environment is just blank (see test in cardboard app)

I learnt that that image/drawing i wanted to put in google VR would have to be a full 360 drawing for the app to take an image of the drawing and render it as a VR environment.

Test 3:


Share:

Sunday, 2 October 2016

Thursday, 29 September 2016

Structura 3: Sparth Interview - Notes (29/09/2016)


  • Structura book (first art book) Lots of images, little text, explanations when necessary.
  • Structura (1) smaller book, easier to carry around.
  • Structura 3 - Larger book, images look better in a larger scale, especially with vertical composition.
  • been pursuing/developing a more graphic style. Older images more rendered/detailed.
  • Graphic style process is faster to achieve.  
  • Sparth says he is a better artist with deadlines. Plan in advance, give self a time-scale to produce best work. (30 minute exercises/3 hour exercises)
  • Better to have an image that is straight to the point, this is easier to achieve when on a time style because it makes you prioritise.
  • He uses flat brushes with no pressure sensitivity. Uses brush tool as displacement technique. 
  • Custom shapes, clone stamp tool makes images look fresh, (uses them often in his process).
  • Rather than old work with detailed rendering all the way through, he uses his quick graphic design techniques as the base for more detailed, production pieces but just spends more time adding detail after the main image has been blocked out.
  • Production vs fast stuff (good to have both processes displayed)
  • big pieces can take 24 hours. Not practical all the time however because of time constraints, hence having fast processes.
  • Fast pieces have to be snappy with an instant message (with focus on a composition that works.
  • He uses a lot of diagonal lines to help with visual flow through an image.
  • Concepting is like writing a text, but explain things with lines.
  • He talks about where young concept artists struggle the most with image making:
  • He thinks photo bashing if done wisely, using specific amount of photos, crediting is important if you aren't the image source.
  • Issues come from bad composition in students, foundation of image is often weak.
  • Better to have unrendered image, if images are placed in best way with good composition.
  • From a distance, no one gives a crap about details.
  • Thing that catches the eye is the way storytelling is applied to canvas through good lines/composition. This is way more important than rendering.
  • Make a conscious effort to practice compositional skillset.
  • THINK: What is purpose of image, what is intent? Everything in image has to prove a function/intent. WHY are you putting a specific brushstroke somewhere?
  • He focus' better without having music on in background.
  • Silence is most focused atmosphere.
  • WHY are you creating this image?
  • Linework first > then shape (This is the opposite to what I'm usually told) This is unusual. subject? > composition.
  • Wanting images to always look simple.
  • Has a graphic nature to shapes in recent work
  • Simplicity can drive image to success/less is more sometimes.
  • Better to convey something with one great point, than multiple small features. 
  • Image never needs more than 3 focus' or viewers attention will be too divided.
  • Keep simple path to convey visual intent.
  • Creates more experimental work with primitive shapes. Squares, circles, line tool. Maybe bit of gradient at the end. (gives focus point and strong visual lines).
  • Learn to use tools differently and originally.
  • Use some full bleed images in artbook for emphasis
  • By using smudge tool at 1% opacity you can push images around to create different shapes by displacing the image. (create great shapes out of a few design tips and tools, make work very fast by pushing simple shapes around.)

Examples of (quick/bottom 2/3 image sets are 30 min) work from Structura 3:


A more rendered example of work from Structura 3:

Old example of Sparth's more rendered/less graphic design inspired work from Structura (1):

 As you can see, the shapes/concepts are less clear and defined with less/few hard edges, when compared to his more developed/recent work. 
Share:

Wednesday, 28 September 2016

Meeting with Lynn (27/09/16) and Ryan (28/09/16)

Ryan Notes:
  • Concept art and where it comes from.
  • New methods of creating concept art, new procedures, what could the industry look like 10/20+ years from now (Look at terrible 90's concept art).
  • Alternate versions of the concept art pipeline - 
  • developed for VR.
  • Hive - 3D painting program.
  • Sparth - Artist - 3D concept design.
  • Look at Pre-Vis, How things are supposed to move. Look at the watchmen graphic novels (animated).
  • How to create ideas quick with these new methods.
  • Look at 360-degree concept art.
  • Concept art using cardboard VR headset.
  • Origins in theatre and theme park design for example. At the base of the project, you are a DESIGNER.
  • Think of effects of project for movies that are getting more and more unrealistic (Superman, for example) Benefits of other senses in getting across a concept.(VS Scottish cottage concept where a simple picture would do).
  • Solving the problem of not being able to portray VR with current concept art/design process.
Lynn Notes:

  • Look at pipelines - Animated, graphic novels, concept art, world building.
  • Look at pipeline processes for games and film, decide which you would rather develop for (processes are very different)
  • Media tests - (move/animate work that was not designed to move vs stuff that is/was, see how processes compare).
  • Set tasks per week, schedule time. In a week do a reading task, making task, reflecting task and a case study.
Share:

Thursday, 22 September 2016

Week Three: Lynn's Lecture - 21/09/16

Today we talked about what research methods are, and research in practice.

  • Research methodology is how to undertake a project.
  • Research methods help us to generate/gather data.

Research aim: General statement of intent.
Research objectives: Core research questions under a research aim.

Context is important! (Who is the research for? What are the key theories in my ares of interest?)

Ways of conducting research:

  1. Observe and measure, discover laws and relationships.
  2. Seek out interpretations by conducting research among people.
  3. Seek to confirm a hypothesis through collecting data.
  4. Develop a theory from observations, test theory by experimenting and observing, determine if hypothesis is confirms theory? If not, refine and repeat.
  5. Research through making things (practice).
  6. Observational notes.
  7. Interviews.
  8. Focus groups.
  9. Case studies.
Mix methods together to strengthen research.

Research Finding Types:

  • Primary Data: Discovered/generated by me through application of research methods.
  • Secondary Data: Publicly available, pre-existing data done by other people. Can be used to support my case. 

Analysing/Evaluating Data:

  • Key theories
  • Reflection
  • Analyse objectively
  • Generate data
  • Present/defend findings

Ways of conducting research in an artistic field:

  • Developing/making work for analysis/reflection and presentation
  • Photography (of world) - observation
  • Analytical drawing (of world) - observation
  • Video (of own practice) - observation
  • Mind maps
  • Sketchbook
  • Sculpture
  • Reflective Journal
  • Audio reflection
  • Sweatbox process
  • Peer groups
  • Case study
  • Interview
  • Questionnaire
  • Focus Group
  • Contextual Review
Share: